


What is Gelatin Cake Art?
Gelatin cake art is created by injecting a colorful base into clear gelatin. It creates a 3D art display that molds the cake together. While the most common designs are of gelatin flowers, artists can create anything using gelatin, from beer bottles for Father’s Day to Disney characters for children’s birthday parties. In fact, gelatin cake art can be used to celebrate a wide range of holidays.
Believe it or not, gelatin cake art got its start in savory foods. Originally, clear gelatin was mainly used in aspic — a savory jelly mold typically containing pieces of meat, seafood or eggs. When this dish came to America in the early 20th century, its primary purpose was to keep cooked meats fresh. Over time, aspic’s popularity decreased and people began using clear gelatin in desserts. In particular, Jello salads became a potluck favorite. To this day, gelatin is still included in many desserts, and it’s often used as a form of cake art.
How to Create Cake Art with Clear Gelatin Powder
In this section, we’ll explain how to make gelatin cake art using clear gelatin powder.
Step 1: Prepare the Clear Gelatin
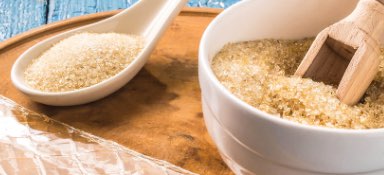
Before the cake decorating can begin, it’s important to create the gelatin base. To start, you’ll need the following ingredients:
- 3 tablespoons clear gelatin powder
- 2 cups white sugar
- 4 cups water
- 1 teaspoon citric acid powder
- Food flavoring
After gathering the ingredients, mix the clear gelatin powder with 1 cup of cold water, and let it soak (or bloom) for 10 to 15 minutes. This allows all the water to be absorbed.
Next, heat three cups of water, 2 cups of sugar and 1 teaspoon of citric acid in a saucepan. Stir occasionally to dissolve the ingredients. Once vapor appears above the water, remove the saucepan from heat. You’ll want to avoid letting the water reach a boiling point.
After removing the saucepan, add the soaked gelatin. Stir until it dissolves completely and there are no clumps. Then, add flavoring as desired and let it cool in the pan at room temperature for one to two hours. During this time, the gelatin base will become clear, and any foam will disappear from the surface.
Once it’s cooled, pour the gelatin into containers for storage. Make sure to remove all air bubbles from the surface. Then, put it in the refrigerator uncovered. You can keep the gelatin there for several hours or leave it overnight.
When the gelatin has set, cover the containers with foil or lids to prevent it from drying. This will help it avoid cracks and tears, as well.
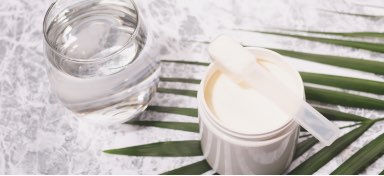
Step 2: Prepare the Gelatin Color Base
Now that the clear gelatin base is ready, it’s time to create the color for decorating. Gather the following ingredients:
- 1 tablespoon clear gelatin powder
- 1 cup of milk or milk substitution
- 1/2 cup white sugar
- 1 teaspoon vanilla sugar
- 3/4 tablespoon titanium dioxide (optional)
To start, mix 1 tablespoon of clear gelatin powder with 3 tablespoons of cold water. Let it bloom for 10 minutes until the water is absorbed.
During those 10 minutes, heat 1/2 cup of milk, 1/2 cup of sugar and 1 tablespoon of vanilla sugar in a saucepan. Be careful not to let the milk boil. Do this until vapor appears above the surface.
Next, remove the milk from heat and add the gelatin. Stir them together until the gelatin has completely dissolved.
After that, add the remaining 1/2 cup of cold milk. If you plan on adding titanium dioxide, add it to a small amount of the color base. Using an electric mixer, beat the ingredients together, and then add the rest of the base.
When the mixing is complete, remove the foam from the top of the base and let it cool. Once it reaches room temperature, it’s ready to be used.
Step 3: Start Decorating
Gelatin flowers are a fun, simple design to create. To draw them, you’ll need a simple syringe with a needle or specialized gelatin art tools.
Pay attention to the color base’s temperature. The clear gelatin from step one should be kept cool, but it’s important for the color base from step two to be slightly above room temperature. This will help it maintain the perfect texture without getting too thick or too runny. If you intend to make multiple flowers, it’s best to work on them all at once. This will ensure the colors are consistent.
After designing your flowers, prepare another batch of liquid clear gelatin. Add a few drops to each flower hole. This will prevent it from leaking into the cake while also sealing in the color.
Next, remove each flower from the container and place it onto a tray. Use saran wrap to prevent it from sticking.
Step 4: Place the Dish in the Appropriate Containers
To form your cake, you’ll need two containers of different sizes. The containers’ heights should be larger than the width of the flowers. Plastic, glass and metal containers are all good options.
Start by placing the smaller container into the center of the larger one. To weigh it down and keep it in place, fill it with water. Once the first layer of gelatin’s texture has thickened a little more, pour more clear gelatin into the opening. This will help your flowers stick.
After you’ve poured more clear gelatin, take each flower and place it in the outer pan so that it borders the inner pan. When all of the flowers have been placed, fill the large pan to the rim with clear gelatin. Leaving the pans just as they are, place them in the fridge for several hours.
Once the outer layer has set, take the pans out of the refrigerator. Remove the cold water from the inner container, and fill it with warm water. Once you see the water spinning freely, it’s safe to lift the inner container out of the larger container.
You either leave the outer layer transparent so the inner layers are visible, or you can add another layer of colored gelatin to create a contrasting background for the flowers.
Step 5: Finishing Touches
Creating the cake’s center can be as simple or detailed as you’d like. We recommend filling the center with one color of mousse for a crisp, elegant look. Or, if you’d like, you can pour two different colors of mousse at the same time to create a swirl. Keep in mind, mousse thickens quickly.
To remove the cake from its container, slide a toothpick around the edge of the pan. Fill either the kitchen sink or a large container with warm water and lower the pan with the cake into it. Both of these tactics will help release the cake. After waiting a few seconds, turn the pan upside down onto a serving tray. If necessary, you can use a small, flat spatula on either side of the cake to help it slide out.
Benefits of Using SuperClear Gelatin
When it comes to creating gelatin cake art, the trick is to use high-quality gelatin that has high clarity, emits little-to-no odor and makes a firm jelly. That’s where SuperClear Gelatin can help. This clear gelatin powder is made of 300 Bloom Type A unflavored pork gelatin. Using SuperClear Gelatin for cake art provides the following benefits:
- Edible, unflavored gelatin – Use any flavoring or coloring you’d like without any unwanted aftertaste.
- Unmatched clarity and strength – This helps make beautiful gelatin cake art.
- No jiggle – Its 300 bloom ensures a strong set and a firm finish.
- Top-quality – SuperClear Gelatin is made with premium, clean collagen products to deliver premium results every time.
Create Beautiful Cake Art with SuperClear Gelatin
Gelatin cake art is a fun, creative way to take desserts to new heights. Best of all, Custom Collagen sells SuperClear Gelatin individually and wholesale, so you can get just the right amount for either yourself or your customers. With premium ingredients and unparalleled quality, it’s the perfect choice for gelatin cake art and many other recipes. Get started on a culinary project with SuperClear Gelatin by Custom Collagen today!
Related Articles
How to Buy Hydrolyzed Collagen: What to Look for When Purchasing it Wholesale
Collagen has proven its worth as a nutritional supplement time and time again. All of the connective tissues in our bodies contain […]
Guide to the Benefits of Different Wholesale Collagen Supplements
As one of the most abundant compounds in the body, collagen is vital to forming the tissues that make up organs, bones and more. Collagen supplements, when taken regularly, have been shown to provide numerous health benefits, including support for bone health […]

A Closer Look at Gelatin Grades and What They Mean
It’s no secret that gelatin provides great benefits to a variety of industries. For hundreds of years, it’s had a vital role in products and services all over the world. But how do you decipher between different types of gelatin? That’s where gelatin grades come into play […]